
I enjoy using Sugar Bytes’ DrumComputer because it is capable of creating an incredibly broad range of sounds, has a range of parameters that can be modulated to increase expressiveness, and includes an advanced feature-rich sequencer.
Dave’s Punchy Kicks for DrumComputer
Some lament that DrumComputer’s kick drums aren’t punchy enough for certain EDM needs.
While many are not of the super-punchy type used in certain EDM genres, it is capable of creating pretty punchy kicks that will suit many needs.
To help others enjoy this great plugin, I’ve put together a free pack of 90+ DrumComputer kick presets, many of which have a good deal of punch. (These are one-shot sound presets, not sequences.)
Most of these kicks have multiple velocity responsive parameters for added expressiveness. To get the full punch, you must trigger them at full velocity. That may mean manually setting some or all of your note velocities to maximum in DrumComputer’s internal sequencer or your DAW.
Many of the presets sound quite similar with only subtle differences. While some fall into the creative and less-punchy realm, my primary purpose was to provide a number of kicks ready or nearly-ready for EDM-style tracks. Above all, I hope they provide you with starting points and ideas for creating your own kicks. You’ll still likely need to do some eq’ing do get them to sit in your mix and tune them to your needs.
A few tips to get you started:
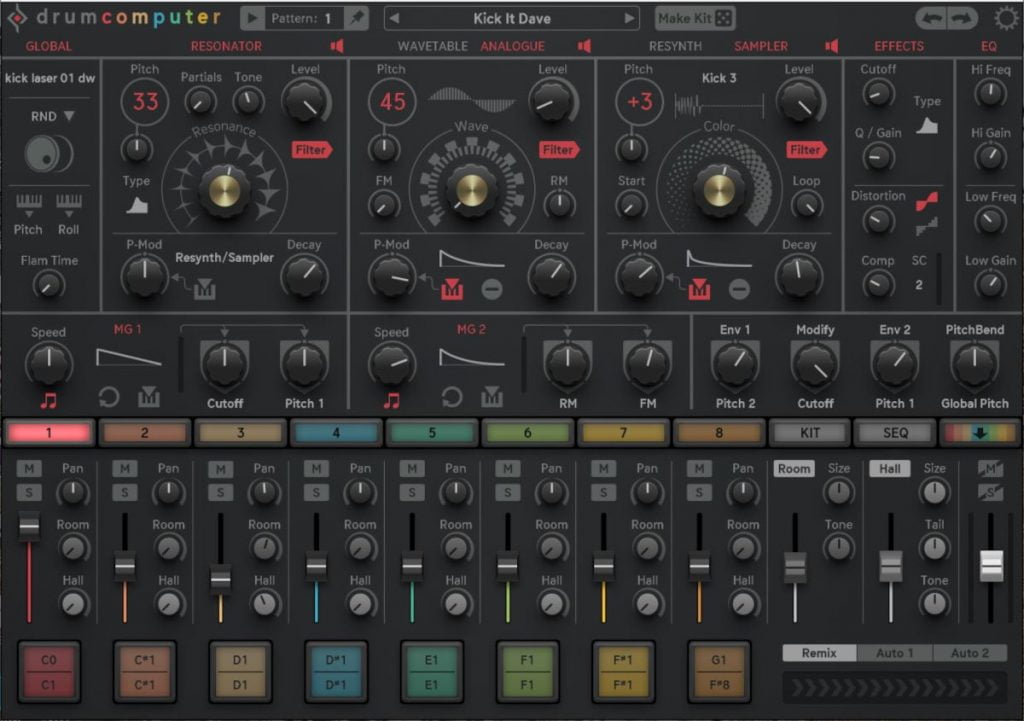
- If a kick doesn’t sound tight enough, try shortening its global decay time. Adjusting the envelope type and decay time on the wavetable/analog module can make a big difference, and lowering the resonance slightly may also help.
- If you’re not getting quite enough deep bass thump, increase the EQ gain at the kick’s fundamental or base frequency (e.g., 55 Hz if tuned to A or note #33 in DrumComputer), or slightly increase the resonance on the resonator module. Be careful, as too much bass can decrease clarity.
- Increasing the EQ in the 1.5-2 kHz range can help the kick cut through a mix.
- Play with the compressor settings, including both level and style (e.g., “punchy” vs “relaxed”). See how things sound without any compression at all.
- Experiment with incorporating some of your own samples into the presets, as these presets use only the samples distributed with DrumComputer.
- If the kick doesn’t have enough body or midrange frequencies for your taste, start by making sure you’re using the “No EQ” version below. Then if needed, use the internal or an external EQ to increase the gain of desired frequency range(s) if needed. Try raising the wavetable/analog module to a higher pitch. Scroll through different wavetables and kick samples.
- Some people prefer to “carve out” portions of the kick’s frequency range and emphasize others to make more room for other instruments including bass, while others prefer to rely more upon a sidechaining or a ducking/gating plugin to temporarily reduce the volume of other instruments when the kick hits. Some prefer a blend. Depending upon your approach and your overall arrangement, a kick that sounds great in isolation may not sound good in the final mix, and vice-versa.
- Try using some of your favorite kick samples from other sources with the sample module. While the developers have improved that module’s performance significantly, some samples seem to exhibit a slight reduction of sharpness in the initial transient when played back through DrumComputer. If you notice this, try adding 1 to 2 ms of silence to the beginning of the sample file with an audio editor, prior to importing into DrumComputer. DrumComputer seems to “fade in” samples very slightly (perhaps to reduce “clickiness”?), and adding this very small amount of silence seems to move the very beginning of the sample past that point. If you have a lot of files you want to process, see this explanation of how to batch process files in Audacity using its chain/macro feature; you’ll be adding silence rather than normalizing the file as in that example, but it provides the basic idea. Use whatever audio editor you prefer, and perhaps try it with just one or two files at first to see if the perceived change is worth the effort to you. I’ve noticed an audible difference with some samples but not others, but this is in isolation and not a final mix. There’s a discussion about this on KVR Audio if you want more details.
There are two options below. They are identical except for the following: The “No EQ” version excludes gains around the fundamental and around 2 kHz that are present in many of the original version’s presets, and also decreases any filter gains around the fundamental by ~ 3 dB.
See the readme file included in the zip file for basic installation and use instructions. This preset pack requires DrumComputer v1.2.5 or later.
This resource is free to download and use. However, if you’d like to support my work, please check out a few of my music videos/tracks and give them some likes, or consider buying my music or books.
Dave’s Punchy Kicks for DrumComputer, .zip, 70kb, v 2.0, updated 2022-01-18:
Dave’s Punchy Kicks for DrumComputer, No EQ, .zip, 70 kb, v. 1.0, updated 2022-03-15:
For a much larger and more diverse set of drum presets, including many patches with fun responsiveness and automation, check out Embrays Designs‘ presets. The few bucks will save you a lot of tweaking time. I’ve gotten some creative results when using those in DrumComputer alongside Bitwig’s MIDI note effects, and they inspired me to add more velocity responsiveness to my presets. And of course, there are many outstanding presets by a range of designers already in DrumComputer. Have fun!