
This guide explains how to brew delicious, bubbly, refreshing homemade kombucha using a two-stage fermentation process, with a one-gallon jar and swing-top bottles.
I learned how to make kombucha by reading several online guides, and by talking to several people about what seemed to work best for them. So this guide is a hybrid of many others’ knowledge alongside the results of my own experimentation. In addition to reading this guide, I recommend checking out a few other online guides to get additional opinions and to fill in any gaps I’ve left.
I hope you enjoy and find useful what I’ve included here!
If you’re not yet thirsty, check out these two short videos of deliciously bubbly homemade ginger-pear kombucha before reading further.


Disclaimer
Any home fermentation process has a small amount of risk and unpredictability associated with it, which includes variation in amounts of alcohol produced. While the process here is intended to produce a product that has negligible amounts, the author takes no responsibility for any health-related impacts, overpressurized bottles, or other damages that result from your home kombucha brewing adventures.
Make the Initial SCOBY

SCOBY definition = Symbiotic colony of bacteria and yeast. Yummers! If everyone knew how much of our bodies are made up of microorganisms, including beneficial ones, this stuff would be even more popular.
Make a cup of sweet tea using the following:
- 1 cup water
- 1 tablespoon white sugar
- either 1 teabag of black tea (I use English breakfast; just don’t use one that has oils added like Earl Grey) or 1 teaspoon of loose leaf black tea.
Let it cool–if it’s hot, it can kill beneficial microorganisms in the kombucha you’ll be mixing it with.
Pour the sweet tea into a gallon glass jar with one 16-ounce bottle of raw kombucha. Use either plain or ginger. I’ve had good luck with GT’s gingerade flavor–oddly, better luck than I’ve had with their plain flavor, even though some guides call for using plain. I’ve come to believe it’s because ginger has super-magical properties! Make sure it’s a raw kombucha. With GT’s, you may have even better luck with their “classic” line.
By the way, while I really enjoy homemade kombucha, I still enjoy buying some in the store from time to time. They have some delicious styles and flavors that are difficult to emulate.
Cover the jar with an air-permeable material that will keep out fruit flies and ants, such as a paper towel or cheesecloth, with one or two rubber bands to hold it in place.
Put a reminder on your calendar to check your scoby 10-14 days after you start it.
Put the jar in a dark place, undisturbed, where it will stay at least 70 F if possible. If it’s wintertime, an upstairs closet that’s not along an outside wall could be a good place. You may want to research ideal temperature ranges.
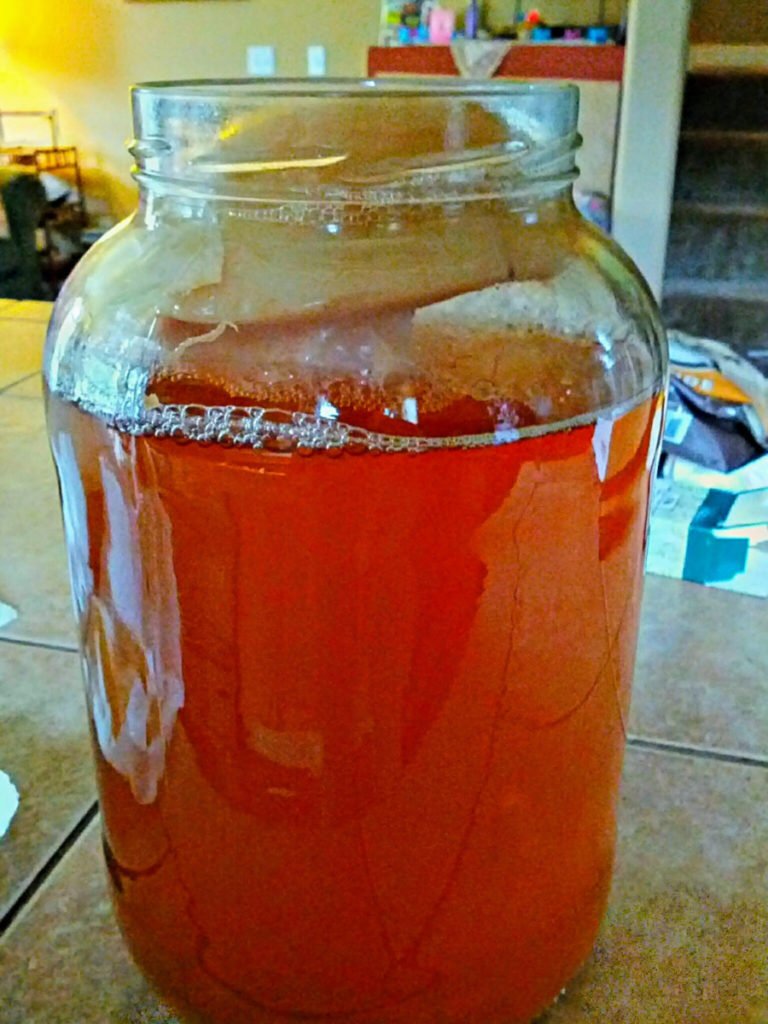
After 10-14 days, you should have a scoby on top, along with 2-3 cups of now-fermented starter liquid. I’ve gotten a good initial batch after the scoby is only around 1/4 inch thick. Some guides say you need to let it get thicker, but that hasn’t been my experience.
Make Extra Tea to Add to Starter and SCOBY
(after initial 10-14 days)
You’ll be adding 1 to 2 cups of the starter to the freshly brewed tea, along with the scoby. There’s no exact science to the starter amount; feel free to experiment. So to fill a one-gallon jug while leaving a bit of space at the top, you’ll need 11-14 extra cups of freshly brewed tea, depending on how much you wish to fill the jar.
If the jar is tapered at the top, you may not want to fill it all the way so that your new scoby (which will form right on the surface) will be as large as possible. The existing scoby doesn’t need to be able to float right at the surface for the new batch of tea to ferment, but some folks think it’s best to maximize the surface area available for oxygen at the top. So I’ve never filled a tapered-top jar all the way up. Again, feel free to experiment.
Loose leaf method
For 14 cups of tea, I use 7/8 cup of white sugar and 3 heaping tablespoons loose leaf tea. You can use 3 tablespoons black or you can make up to half of it green tea. (I recall reading somewhere it’s good to have at least part of each batch be black tea.) I prefer a blend of 2 tablespoons English breakfast and 1 tablespoon green jasmine tea. I’ve had good success with Frontier brand, found in bulk sections of some stores. Just don’t use a tea that has oils added to it such as Earl Grey, as apparently that’s bad for the scoby.
Get organic if you can. If for no other reason, any pesticide or other chemical remnants in non-organic tea could disrupt the growth of the probiotics.
One of the easiest ways I’ve found to make the big batch of tea (14 cups) is to use three containers: a French press, a small pot that holds the same amount of water as the French press, and a large pot that holds at least a gallon (preferably at least 1.5 to 2 gallons, so it doesn’t overflow when you stir in the sugar).
I first put enough water to fill the French press in the small pot to heat it, and the remainder of the 14 cups of water in the large pot. In my case, the French press holds 4 cups, so I heat that in the small pot and 10 cups of water in the large pot.
I brew the tea in the French press, pour the concentrated tea into the larger pot, and then add the sugar. Stir it well to dissolve all the sugar.
Teabag method
I’ve had more limited experience using teabags instead of loose leaf tea, but when I have, I’ve used 8 to 10 teabags for about 14 cups of tea: 5-6 English breakfast teabags and 3-4 green jasmine teabags. You might do a bit more research for recommended amounts.
Also for this method, I use 7/8 cup of white sugar.
If you use teabags, you can heat all the water in one large pot, tie your teabags together to something like a spoon so they’re easier to pull out, let them steep for 5 minutes, and then add your sugar after removing the teabags.
After Tea is Made and Cooled, Combine with Starter and SCOBY
It’s important to allow the tea to cool to room temperature before adding it to the scoby and starter. It can be slightly warm, but not hot. Otherwise, you could kill many of the important microorganisms in your scoby and starter.
You have two options for adding your tea to the scoby:
Slightly more complicated way (but more tried and true)
Wash your hands and make sure all soap is removed before handling the scoby and removing it from the jar. Dump a bit of the starter into another small non-metal container before lifting the scoby out of the old jar and temporarily setting it aside in some of the starter. Then dump the new tea into the jar with the starter, and place the scoby back into the jar so it’s floating on top, same side up. (I don’t know if it’s essential to have the same side up, but when I’ve done it this way it has yielded good results. Feel free to read up on this or experiment, if you wish.)
Note that with this slightly more complicated method, the important things are to avoid contacting the scoby with any traces of soap, and to use a bit of the starter on any already-clean containers into which you’re placing the scoby. According to a few other opinions, this latter step ensures that the acidic solution kills any unwanted microorganisms before the scoby comes in contact with the surface. I don’t know how necessary this is since the scoby is already pretty logged with acidic solution, but I do it anyway because it can’t hurt–and it’s worked for me and others.
Quicker and easier way
The easier way is to pour the new tea into the jar with the starter and scoby. Do it gently if you wish to avoid tearing a hole in the scoby. I’ve found this method to work fine, even though the scoby is less likely to float to the surface, where the newly-formed scoby will cling to it and make a thicker scoby. Instead, the new baby scoby forms completely independently of the parent scoby, which floats down further. I haven’t found it to be essential that they grow in contact with each other, so I’ve tried it once successfully using this easier way.
For future batches, you’ll want to remove your scoby and some starter from the tea before bottling anyway, so this easier method is really feasible only for your first batch after creating your initial scoby.
First-Stage Fermentation: Return Jar to Warm, Dark Place
Reseal the jar with the paper towel or cheesecloth and rubber band(s). Return it to a warm, dark place.
Check your tea every few days. Not a lot can go wrong, but some odd things can happen. I’ve had one or two cases where the air from the fermentation has forced the new and old scoby to bubble up above the rim of the jar because it was too tight, taking the scobies out of contact from the liquid. I had to use a spoon to push them back down. This does not usually occur, though; and when it does, it means the fermentation is producing a lot of gas!
Second-Stage Fermentation: Bottle Kombucha After 7-8 Days

It’s finally time to remove your kombucha from hiding. It’s hard to describe how it should taste, and there’s not a huge difference between 7 and 8 days. If you don’t have at least a tiny amount of effervescence and tartness, probably best to let it sit an extra day or two.
Set aside SCOBY(ies) and some starter for next batch
Before bottling, set aside at least 1-2 cups of the fermented tea to use as starter for your next batch, along with one or two of your scobies. Remember to put the starter into the new container before placing the scoby in it, so that the acidic solution kills any unwanted microorganisms before the scoby comes in contact with it. Or, if you’ve already filled another jar with a new batch of fresh tea, just transfer 1 to 2 cups of starter and your scoby directly into that.
I’ve more recently begun experimenting with transferring two scobies–the new or baby one, and one of the old ones to the next batch. That way I’m getting the benefits of the “new growth” and the “established growth.” The one thing I’d probably avoid is transferring only the old portion more than a few times. Opinions vary on the life span of a scoby.
If your parent and baby scobies are growing together, which will happen if the old one floats on the surface, you can let the whole mass thicken over several batches before you peel it in half to thin it and compost the older portion.
I usually try to add fresh tea to the starter and scoby(ies) within 2 or 3 days, if not right away. If it’s going to be longer, consider adding a cup of fresh tea (as you originally added to the bottle of store-bought kombucha) to ensure that the living organisms have things to continue feeding on for at least another week or more. Opinions vary on how long the scoby and starter remain good without a fresh tea recharge.
As you begin to accumulate extra scobies, you can give them to a friend with a cup of starter, or put them in your composter. Some people have come up with other uses for them, too; just do a bit of research online.
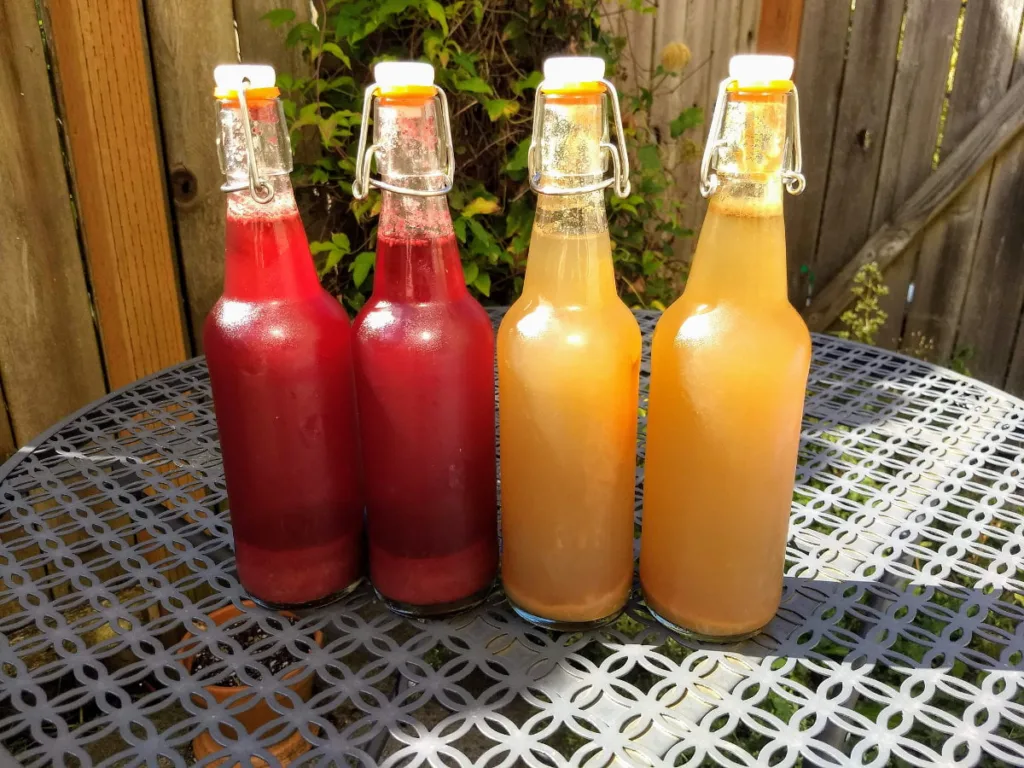
Bottle your kombucha
With the method I describe here, I can get about six 16-ounce bottles per batch.
Clean 6 glass swing top or “grolsch” bottles using dish soap and oxygen cleaner (or other preferred cleanser), along with a bottle brush if necessary. This style of bottle is very helpful, as the airtight seal allows for carbonation, and it allows you to open the bottles to let them breathe–more on this in a moment.
Make sure all the soap and cleanser residue is removed from the bottles.
Using a funnel, pour the following into each bottle (many types of fruit are possible–this is just one of my favorite combos):
- 4 teaspoons of fresh ginger juice (may be juiced ahead of time and refrigerated, but should have no preservatives)
- 1/3 cup pear juice (preferably organic and free of preservatives)
- fermented tea, until partially up neck of bottle, about two inches from the top
Some notes on the above ingredients, and on filling the bottles:
Rather than measuring each ingredient into each bottle, you can also measure the entire batch’s worth of ginger juice, fruit juice, and fermented tea (or other blend of desired ingredients and tea) into a second large jar or pitcher all at once. Then pour the already-blended mixture into the bottles. This will reduce measuring steps but will require some math in advance.
You can buy ginger juice made by a company such as The Ginger People, or you can run fresh ginger through a juicer. I do the latter when I’m able. I suggest having a window open nearby with a fan blowing out while you’re juicing, or doing it outside. Even if you love the scent of ginger as I do, juicing releases so much aroma that it can irritate your nostrils and throat.
You can also chop your ginger into small matchstick-thickness pieces and drop it into the bottles if needed–you may simply need to fish a few pieces of ginger out of a cup with a spoon after pouring. I have not done it this way, but have tried tasty kombucha from others who have used this method.
You can experiment with slightly less fruit juice–like 1/4 cup per bottle, keeping in mind this will leave you with a little less starter for the next batch. Also try different kinds of fruit juice. I’ve had good luck with pear, black cherry, and pomegranate. Pomegranate has had less carbonation, though. Look at the grams of sugar per serving on the fruit juice bottles; those with less sugar seem to generate less carbonation, in my experience.
I’ve also enjoyed adding vanilla extract and some spices like freshly ground cardamom. Certain herbs and spices can impede microorganism growth and fermentation. So when experimenting, initially try each new combo with just a bottle or two of kombucha. That way if something doesn’t work, you don’t have too many “dud” bottles. There does seem to be something special about ginger, as I find the batches with ginger seem to ferment better in the second stage than those without it. But I also love the flavor of ginger, so I’m biased.
It’s important to leave some headroom or air space at the top of each bottle, as this helps the carbonation to develop. I’ve heard a few opinions on how much space to leave, but with my method I’ve found between 1 1/2 and 2 inches of headroom to be optimal, with 16-ounce bottles that have narrow, tapered necks. Please don’t rely on the photo below for accurate measurement; measure from the top of your own bottles, after the foam has largely settled.

Seal the bottles and place them in a warm, dark place.
Breathing the bottles
After the sealed bottles have been in a warm, dark place for 24 hours, pop the lids briefly and reseal them. This allows fresh oxygen, which seems to help with carbonation. Sometimes a bottle will already be quite fizzy at this point, so do this over a sink and be prepared to reseal the lid quite rapidly. Wear a shirt that you don’t mind getting sprayed, as that happens occasionally.
After this “breathing,” allow the bottles to sit for another 2-3 days before refrigerating. I find 2 days to be sufficient in the summer, and 3 days helpful in cooler weather. Don’t lose track of sealed and unrefrigerated bottles, or you may end up with a mess to clean up. Some bloggers suggest longer second-stage fermentation times.
I haven’t had a bottle seal fail on me yet, but for the second-stage fermentation, I still recommend placing the bottles in a place where a “blowout” wouldn’t ruin anything.
Disclaimer Regarding Storage
Following more than a dozen batches, I haven’t yet had a bottle explode or leak all over the fridge on me, but I can’t guarantee that this won’t happen to you. My best assumption is that the rubber-sealed swing top would give before the glass would break, making the worst-case scenario a messy fridge. But I can give no guarantees.
The longest I’ve usually refrigerated a bottle of kombucha after brewing is probably about 2 months. Sometimes a batch will already be pretty fizzy and pressurized within a day or two after refrigerating, or sometimes it won’t be that pressurized for another week or two. Sometimes they will develop a lot more pressure as time goes on, while sometimes it will level out or increase very little. I did open one bottle after about a year; it was still drinkable, but a bit sour for my taste and barely carbonated.
Tip: Keep Notes and Label Bottles
With each batch of kombucha I make, I create a new row in a spreadsheet to track certain pieces of data for that batch. You can also do this in a Google or Word doc or a notebook.
I keep track of the following:
- 1st stage fermentation start and end dates
- 2nd stage fermentation start and end dates
- how much and what types of tea I used
- ingredients/amounts per bottle
- notes about how the batch turned out (taste, amount of fizz, anything else important to you such as body, sweetness/sourness)
I often mark the date the second-stage fermentation was completed on a piece of tape on each bottle, so I know how long a given bottle has been in the refrigerator. I sometimes purposely consume the bottles from a given batch over an extended period, just to see how the character changes as the batch ages a bit.
Have fun!
For Caffeine-Sensitive People
Although the kombucha fermentation process seems to reduce the caffeine content of tea, it does not entirely eliminate it. This article includes several tips for further reducing the caffeine content of your kombucha.